+86 15340683922
 +86 15340683922
الوصف
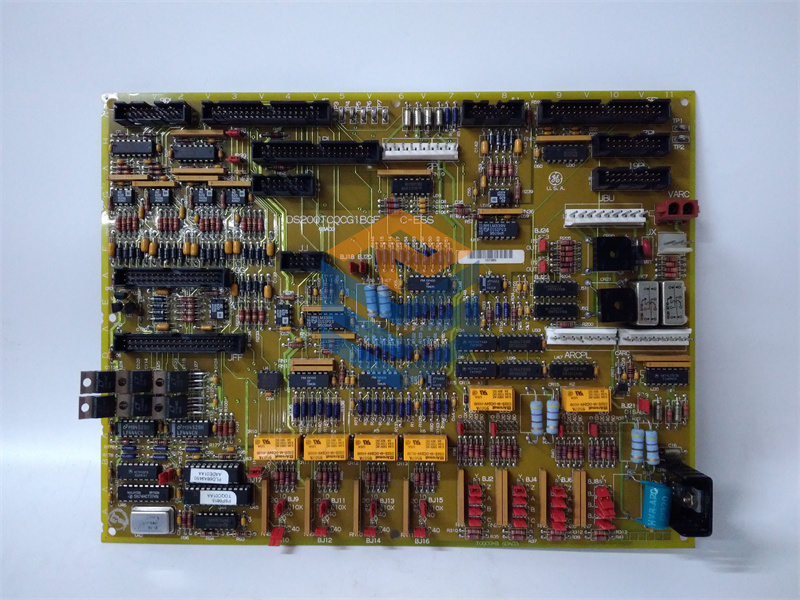
Repairing the GE DS200TCEBG1B/RR communication card requires technical skills in electronics and familiarity with control systems. Below are general steps to guide you through the repair process, but please ensure that you have the necessary expertise or support from qualified professionals for safety and effective troubleshooting.
Steps for Repairing GE DS200TCEBG1B/RR Card
- Preliminary Inspection:
- Visual Inspection: Examine the card for visible damage such as burnt components, cracked solder joints, or broken traces.
- Check Connectors: Inspect all connectors and solder joints to ensure they are secure and without corrosion.
- Diagnostic Testing:
- Use a Multimeter: Measure voltages at various points on the board to check for expected values.
- Conduct Continuity Tests: Ensure that trace connections are intact, especially if the board shows signs of physical damage.
- Identify Faulty Components:
- Component Testing: Test individual components (resistors, capacitors, diodes, etc.) for functionality. Replace any that are found to be defective.
- Integrated Circuits (ICs): If an IC is suspected of failure, consider replacing it, but be cautious about potential issues with soldering or part compatibility.
- Soldering Repairs:
- Reflow Solder: For components with cold solder joints, gently reflow the solder using a soldering iron.
- Replace Components: For damaged or faulty components, carefully desolder and replace them with components that meet the original specifications.
- PCB Repair:
- Trace Repair: If there are broken traces, you can repair them using wire jumpers or conductive paint.
- Cleaning: Clean the board with isopropyl alcohol and a soft brush to remove any flux residues or contaminants.
- Testing After Repair:
- Reassemble: Reinstall the card into the control system.
- Run Diagnostics: Execute diagnostics to confirm that the card is functioning properly.
- Monitor Performance: Observe the system during operation to ensure reliability and stability.
- Documentation:
- Log the Repair: Document all changes made during the repair process for future reference and maintenance planning.
Important Considerations
- OEM Recommendations: If the card is severely damaged or if you are unsure about the repair, consider sending it to an authorized repair center or GE service support.
- Safety Precautions: Always follow safety protocols and ensure that the power is off when handling electronic components.
- Firmware Check: After repairs, ensure that the firmware and software used are compatible with the repaired card.
Conclusion
Repairing a GE DS200TCEBG1B/RR card requires careful diagnosis and skillful handling of electronics. If you’re not comfortable with the repair process or if the damage is extensive, contacting a professional repair service or GE support is recommended.